Data Loss with Windows and WSL
estimated read time: 2 minutes
How Upgrading Windows Can Lead to Data Loss
Recently, I had the bright idea of updating my Windows 11 install to 22H2 via an ISO installation. This caused me a whole world of pain.
For those who haven't tried this approach: when you upgrade by downloading the latest ISO, mounting it, and running the install, Windows will remove all existing applications. The prompts during this process are rather cryptic about what's actually happening.
How to Recover Your Data After a Windows Upgrade
The problem lies in how WSL handles Linux distributions. WSL saves its VHDX files within %AppData% of the runtime user. During the upgrade process, Windows creates a backup of:
C:\Windows
to:
C:\Windows.old
When your fresh version of Windows 10/11 boots up, none of your existing global or user-space applications will be accessible through the Windows menu. If, like me, you reinstall your applications, re-enable Hyper-V and Windows Subsystem for Linux, and reinstall your Ubuntu distribution, you'll notice it's essentially a fresh install—all your original data is missing.
If you find yourself in this situation, don't panic. Here's what to do next.
Locate Your Previous WSL Installation's Drive
You'll need to navigate to:
C:\Windows.old\Users\<your_username>\AppData\Local\Packages\<distribution_name>\LocalState\ext4.vhdx
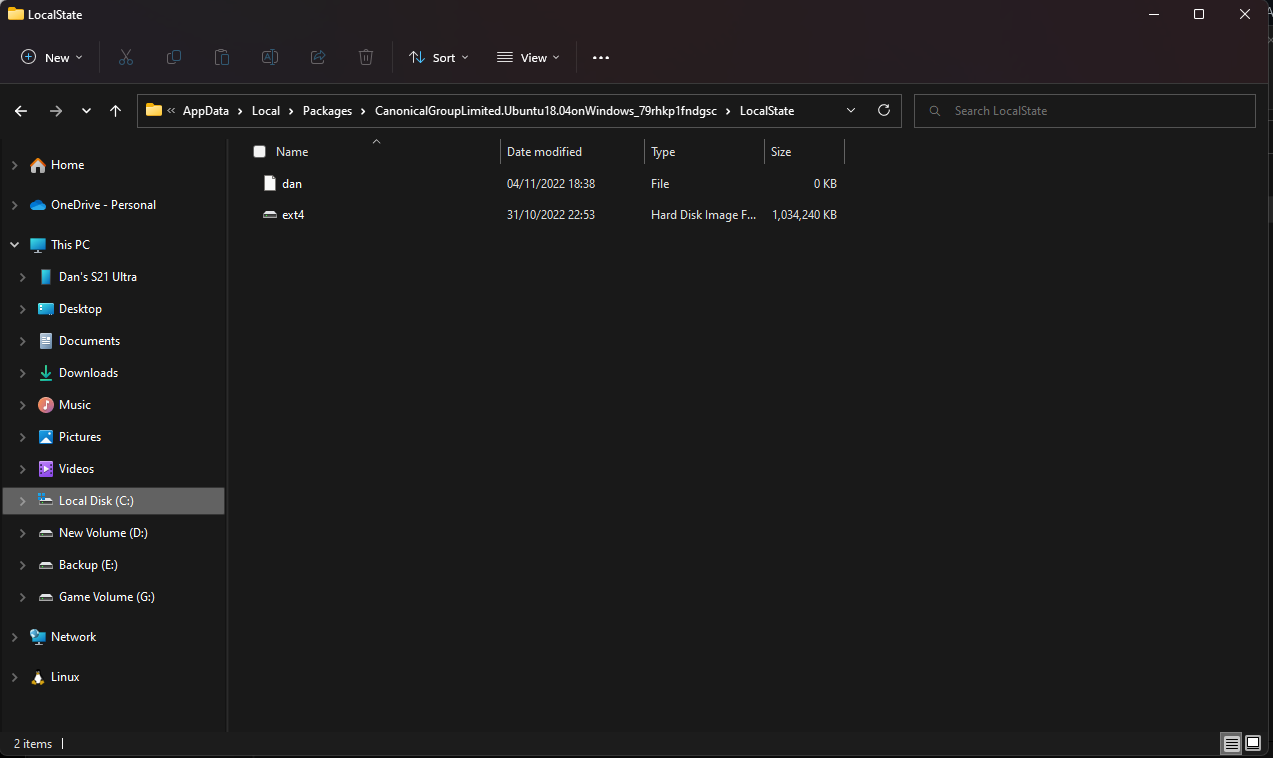
Set Up a New Ubuntu Distribution
Download and install from: https://ubuntu.com/wsl
Install VHDX Support in Ubuntu
sudo apt-get install libguestfs-tools
sudo mkdir /mnt/recovery
Mount the Drive Within the Distribution
sudo guestmount --add /mnt/c/Windows.old/Users/<your_username>/AppData/Local/Packages/<distribution_name>/LocalState/ext4.vhdx --inspector --ro /mnt/recovery
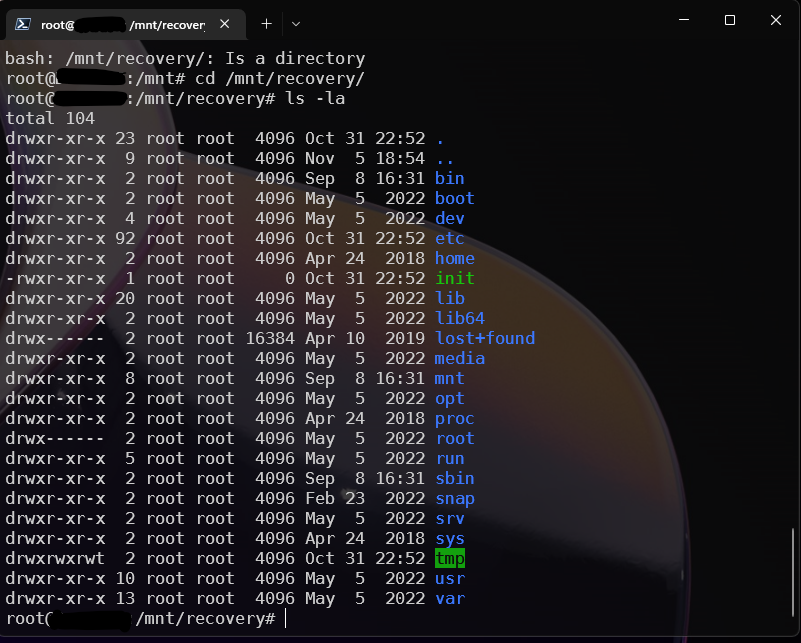
Caution: Check Before Copying the Entire Root Drive
Do not run the following command blindly, as depending on your distribution this could cause serious problems. I would recommend copying only the files you need.
# ONLY run this if copying from and to an identical distribution
sudo cp -R /mnt/recovery/ /
Instead, consider copying just your profile:
sudo cp -R /mnt/recovery/home/<profile> /home/<profile>
Important Reminders
- Be patient. Depending on the amount of data, this could take minutes or hours.
- Do not cancel the job. This is a non-transactional copy—cancelling midway could corrupt your data.
Related Articles
Blocking AI Scrapers: Protecting Your Content from Unauthorised Training Data
68% of my blog traffic this week was AI scrapers harvesting content for training data. Here's how I'm blocking OpenAI, Anthropic, Meta, and other AI crawlers — and why you should too.
Portable Arch Linux: Backing Up and Restoring Your Drive with dd and rsync
Two approaches to backing up a portable Arch Linux drive: a full block-level image with dd and zstd compression via WSL2, and a filesystem-level rsync backup for incremental use. Plus how to restore from each.
Fixing NAT After Inter-VLAN Routing: OS-Level VLAN Tagging on Windows with Hyper-V
When UniFi inter-VLAN routing breaks port forwarding and makes gaming NAT go Strict, the fix is OS-level VLAN tagging — keeping NAS traffic on a tagged path while internet and gaming traffic flows through the Dream Machine as normal.
Automating Cloudflare DNS Updates from a Kubernetes CronJob
When my ISP started rotating my residential IP weekly, I stopped updating Cloudflare manually and built a Kubernetes CronJob that does it automatically every 15 minutes.